 This page was created from a series of articles written by the St. Andrew Lutheran Community Carbon Pilot Team.
Learn more about Community Carbon HERE. Consider becoming a Community Carbon Pilot Team and bringing this important work to your community.
[aio_button align=”center” animation=”pulse” color=”green” size=”small” icon=”none” text=”Community Carbon Page” relationship=”dofollow” url=”http://www.ecofaithrecovery.org/communitycarbon/”]
[aio_button align=”center” animation=”pulse” color=”blue” size=”small” icon=”none” text=”Carbon Garden Page” relationship=”dofollow” url=”http://www.ecofaithrecovery.org/carbongarden/”]
[aio_button align=”center” animation=”pulse” color=”green” size=”small” icon=”none” text=”Composting 101 PDF Download” relationship=”dofollow” url=”http://www.ecofaithrecovery.org/wp-content/uploads/2020/05/Composting-101-Community-Carbon.pdf”]

![]()
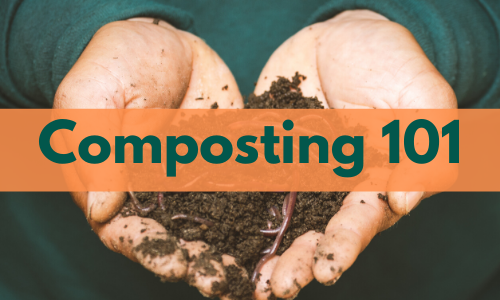
Composting: Another Way to Care for the Earth
Not everyone has the ability to compost, but if you do it has many benefits for your garden and the environment. Our next series of Earth care articles will focus on composting; the benefits; how to get started; how to maintain a compost pile and how to use the compost to benefit your garden.
Composting is the act of recycling biodegradable waste, like food and organic materials. When done correctly, you can reduce your carbon footprint and create a material that is useful around your property. Compost is the product that you get out of composting – a material that you can use as fertilizer in the garden, as feed for your chickens, and to build up the soil structure on your property.
Composting is not difficult, but it does take a commitment. So why do it?
Composting helps build your soil: You will have richer soil that contains more nutrients, minerals, and organic matter. Your plants will thrive off this by giving them the ability to take up more nutrients. Compost also creates a better soil structure. We lose about 1% of top-soil annually, but adding compost can turn the tide, creating better drainage and reducing erosion.
Composting is good for the environment: Studies show that at least 20% of landfill content is purely food waste. Instead of sending your trash to the landfill, you can compost a lot of it to feed back to your garden. This reduces the methane emissions from the landfills. It also lowers your carbon footprint. If you think that tossing your banana peel in the trash is okay because “it’s biodegradable” you must realize that your banana peel can only biodegrade into the earth given the right environment. That banana peel will not biodegrade into the earth when placed in a landfill.
Composting saves you money: Compost adds to the nutrient bearing bacteria and fungi in the soil that feeds plants and enhances root structure. Instead of buying fertilizer, you can use compost that you have made. It also improves your soil health for the long term instead of just for the season. Rather than putting leaves, grass clippings, and small yard debris in the yard debris bin, use these materials to make your own compost.
More than half of what ends up in your garbage is compostable…so why are you throwing it away?
- By LuAnn Staul of the St. Andrew Lutheran Community Carbon Pilot Team
![]()
Eric Lurell’s Lazy Man Composting
This is my lazy man’s guide to an effective compost pile. The compost I have made for many years in my old yard involved little work: no turning, just collect organic matter, add it to your pile, and wait until next spring. This lazy man’s process is not for kitchen scraps, grass, or leaves. I never tried to manage the green/brown balance, but my collection pile contained both key components.
Key Requirements:
-
Critical Mass + Insulation: A compost pile 2-4 inches thick will not be effective. A pile 12-24+ inches thick will work much better, with the top 6 inches providing an insulation layer that keeps the lower material moist and actively decomposing. A compost box (see below) is even better.
-
Organic Matter: Include only herbaceous (non-woody) material, including annual and perennial stems, leave, and roots, flowers, and vegetables. NO kitchen scraps, NO freshly mowed grass, NO woody material, leaves only in moderation. NO weeds with seeds or other plants with seeds. This compost pile works best if it is a mixture incorporating a broad variety of organic matter. Put rejected material from your yard (branches, weeds, grass) into your yard debris can and Grimm’s will make it into mulch you can buy.
-
Soil Inoculant: To make compost, you need soil biota both available and active in your compost pile. Soil biota can come from the soil directly below your pile. However, it is much better to incorporate soil directly into your pile using the soil attached to the roots of your discarded plants. Some people add modest amount of soil as an inoculant as layers of organic matter are added.
-
Moisture: While essential, moisture is both good and bad. If the organic material is uniformly and consistently moist (but not wet), the results will be great. (Note: the insulation layer is essential in achieving this ideal.) But if your pile is overly wet, it can become anaerobic and a stinky mess.
Compost Boxes
A compost box is easy to make and keeps your pile organized and compact. My current box is 24” x 36” with the sides made of old fencing (thus each “open” box is 5+” deep). The fencing is screwed to a short 2 x 2 at each corner. Each open box is independent of the others so I can remove them independently in the spring to access the mature compost at the bottom of the pile. In my old yard, my open boxes were 3’ x 3’ and 5’ tall and were made of 2×10 lumber with 2x4s at the corners. Your box should be sized to fit the volume of organic material in your yard.
Here’s how my system worked in my old yard:
Collection Pile: I had an out-of-the-way shady place where I collected herbaceous material as I worked in my yard. This pile would ultimately get to 3’ high and more than 4’ in diameter during the growing season. Essentially, all herbaceous material would go on the pile except the long thing leaves of irises, daylilies, or daffodils, because they don’t readily decompose.
Chipper: In the fall, I would run the material in the collection pile through my chipper and transfer the chipped material to my compost boxes. At the completion of the chipping, there was a layer of compost several inches thick at the bottom of the pile—a gift to the lazy gardener. How did the collection pile create compost on its own? The regular additions of soil attached to the roots inoculated the pile with soil biota, while the latest materials I added during the summer preserved pile moisture and compacted the lower layers.
Compost Boxes: The chipped material was made up of fine fragments of herbaceous organic matter in various states of decomposition, along with some soil. This is where the real compost was made. The composting process was accelerated by the fine size of the organic matter, the presence of soil biota, and the even moisture preserved by the overlying insulation.
I filled the boxes fully with the chopped and mixed organic matter and watered it thoroughly. Excess water ran out the bottom of the box. I covered the box so that the winter rain would not wash the nutrients out of the compost. In a week or so, you could feel the heat of decomposition. In the spring, the box would be just half full. That’s when I opened the boxes, removed the top insulating layer, and moved the completed compost to my box of completed compost.
One thing I noticed in the years I followed this protocol was that the least effective pile of organic matter was comprised solely of chopped leaves. I would rake leaves, run them through the chipper, and collect the leaves in a pile that ultimately grew to two cubic yards in volume. But the leaves never did compost, even after several years. I believe the problem was due to some combination of three things: 1) soil biota was never incorporated into the pile; 2) the dry leaves were low in essential nitrogen; and 3) the pile was not consistently wet.
Collect. Chip. Water. Wait. That’s my lazy man’s way to make compost.
- By Eric Luttrell of the St. Andrew Lutheran Community Carbon Pilot Team
![]()
Squirrel Composting (the Lazy Woman’s Way)
Adding nutrients to the soil can be achieved in more ways than one. On my property, I have two compost bins in the chicken yard, where fruit and vegetable scraps and garden trash go, along with shredded paper, dryer lint, and pet hair. The chickens pick through this, eat what they want, and turn the piles for me. I get usable compost in three months or less.
In the fall, I gather up all the leaves I can and dump them in the chicken and duck yards to help keep the mud down over the rainy months. By the time spring comes, no evidence of the leaves remains. My birds have incorporated them into the soil, where worms, nematodes, protozoa, and other creatures of the microbiome busily chomp away to release their nutrients.
Whenever I start a new raised bed, I prime it with layers of cardboard, twigs, and food scraps. My newest bed includes the palms we were unable to use on Palm Sunday at St. Andrew. Depending on the depth of the bed, these priming layers can be a few inches to more than a foot deep. Good dirt and finished compost go on top and I’m ready to plant. The following year the stuff at the bottom of the bed has decomposed and fed the soil so I add another layer of dirt to fill the bed to the top once again.
Much like a squirrel, I also incorporate food scraps around plants. Blueberries love acid, so I bury used coffee grounds and spent tea leaves around them. Roses are nourished by banana peels, which contain a lot of the potassium they love, so I fertilize my roses by burying banana peels nearby. And the many crushed eggshells I save also go directly into the garden, sprinkled around tender plants to prevent slug damage (it hurts to crawl over those sharp edges) and incorporated into the soil around tomatoes to prevent blossom-end rot.
Squirrel composting is a quick and easy way to add nutrients to garden soil, it skips the middleman—the compost pile, and it works!
How do you compost?
- By Carol Harker of the St. Andrew Lutheran Community Carbon Pilot Team
![]()
Composting: Where to Put What to Make the Magic Happen
If you are new to composting you will want to make sure you select an appropriate location and container as well.
Here are a few things to consider when selecting a location:
-
Room for access to the compost bins. You will need to have room to add and remove materials to the bins and for air circulation.
-
Close enough to the house so you can readily add food scraps to the pile.
-
Access to water– keeping the compost moist helps speed up the process.
-
Sun or Shade? It doesn’t matter. The internal temperature will heat up no matter where you put it if you turn it frequently enough and have the right mix of brown and green. Shade may prevent the compost from drying out as quickly.
Selecting an appropriate container for the compost doesn’t have to be complicated. You have different options depending on how much space you have. You can buy an enclosed compost bin. Or you can make an enclosed bin out of a trash can. Just drill holes on the lid and down the sides of the bin. I have been using a 50-gallon tumbler for several years, it allows me to readily add materials and turn it every day or so.
If you have more space, you can make a compost bin out of pallets or chicken wire. These systems usually have three bins approximate 3 feet wide and 2-3 feet deep. Having the three bin system can be useful. One bin is for compost that is just starting, the second bin is for compost in progress and the third bin is for compost that is complete.
You can also put your compost directly on the ground in a pile. Just make sure that you don’t make the pile too large. About three to four feet wide and three to four feet high is probably the maximum size you want your pile to be.
- By LuAnn Staul of the St. Andrew Lutheran Community Carbon Pilot Team

![]()
I Made Compost. Now What Do I Do with It?
We’re so glad you asked! In 2019 St. Andrew’s Yard Survey and Citizen Science Team, one arm of our Community Carbon Pilot Team, proposed that homeowners create Soil Gardens on their
properties to feed the microbiome and enrich the soil. You’ll need both compost and local bark mulch to do the job.
How to Create a Soil Garden
Every suburban homeowner could participate in reducing the carbon dioxide in Earth’s atmosphere by creating a Soil Garden. Last year, at least four church members established various sizes of these gardens in their yards. This year, we hope that number will soar.
The process is simple and easy. Identify a 10- foot by 30-foot area (300 sq. ft.) for your project. Your Soil Garden can be established directly on the clay sub-soil, on an existing thin layer of young soil, or on existing lawn. Wherever you decide to put your Soil Garden, be sure to remove any existing landscape fabric. For lawns, cut the grass short and cover it with a layer of cardboard to suppress existing plant growth.
A 300-square-foot garden requires two cubic yards of local plant-based compost and one cubic yard of local bark mulch (preferably red fir). That compost and mulch should cost about $100 delivered, but if you’ve been composting a while you’ll have your own supply on hand and be able to put a dent in the cost. It takes about a half day for one or two workers with a wheelbarrow to spread the compost and mulch. If you don’t have a wheelbarrow, call the church office at 503-646-0629 to borrow one from the garden shed.
It’s not necessary to limit your Soil Garden to 300 square feet. The recipe is scalable, one cubic yard of material (in the 2:1 com- post-mulch ratio) for every 100 sq. ft. to be covered. And don’t use non-organic fertilizers, which tend to halt the good micro-biotic activity necessary to build healthy soil and sequester carbon.
The compost provides the bottom layer of your Soil Garden with well-balanced organic material, i.e. food, which is covered by the mulch layer that protects the compost and keeps it moist in the summer sun. The combination of lots of well-balanced compost and moisture provides the ideal environment for rapid conversion of that organic matter into carbon-rich humus that can be stored (sequestered) in the soil. Periodically (every two to three years), you’ll need to add new organic material to ensure that carbon sequestration proceeds at a fast rate.
Note that while sequestering carbon in the soil can be accomplished using cover crops to collect carbon via sunlight and photosynthesis, our process collects carbon via local yard debris which is then locally composted and sold to the homeowner as local plant-based compost. Why do we focus on local sources? Our area is rich in plant material to be composted. It makes no sense to package it in plastic bags and transport it to a big-box store miles away. Such practices actually add carbon dioxide to the atmosphere and do nothing to mitigate climate change.
Soil Garden Options
Soil Garden Plus
The Soil Garden described above does not require complementary plantings, but homeowners are encouraged to plant their gardens with trees, shrubs, and perennials. We believe it is best to do the planting (especially the trees and shrubs) before spreading the compost and mulch to avoid disturbing the layering. Substantial technical data indicates that adding compost and mulch around newly planted trees and shrubs will improve their establishment and growth. Just ensure that the compost-mulch layer is only one inch thick in the area abutting the trunks of your trees or shrubs.
There are several good reasons to add plants to your Soil Garden. The first is esthetics. With plants, your Soil Garden will look better. The second is that plants can make your mulched garden a “pollinator garden.” Using a variety of native plants will provide food and habitat for native insects, bees, and birds. The third reason is the added benefit of root mass. Substantial documented evidence shows that on farms using cover crops, considerable carbon is added directly deep into the soil via these plants’ extensive root systems. The more plants and greater diversity of plants incorporated into your Soil Garden, the larger the amount of carbon that will be sequestered.
Shrub Border Conversion
It’s possible to use an existing shrub bed or border and transform it into a Soil Garden by adding and maintaining layers of compost and mulch in the 2:1 ratio.
Soil Garden for Perennials
For those with existing beds of ornamental perennials, or if you’d like to establish one, I’ve previously proposed another type of Soil Garden. While it’s difficult to cover an ornamental perennial bed with three inches of compost and mulch, during the dormant season a homeowner could apply about one inch of plant-based compost annually. Doing so should result in similar rates of sequestration in the soil of that bed as expected in other Soil Gardens.
When you do establish a Soil Garden, let us know so we can keep track of the activity amongst members of our congregation. We also welcome feedback on this note and will continue to evolve/revise our recommendations as we learn more.
- By Eric Luttrell of the St. Andrew Lutheran Community Carbon Pilot Team
[aio_button align=”center” animation=”pulse” color=”green” size=”medium” icon=”none” text=”Composting 101 PDF Download” relationship=”dofollow” url=”http://www.ecofaithrecovery.org/wp-content/uploads/2020/05/Composting-101-Community-Carbon.pdf”]